Tag Archives: CAD

Final presentation for my Design Project

For part of the submission for my design project on the Vulcan Works, I am to write a blog entry on my final presentation for the project.

I was so relieved for the presentation day to arrive, yet so nervous.

After a long morning of watching others, it was my turn to present. In my head I knew exactly what to say and when to say it, however, when it came down to it the anxiety took over and I ended up having a mental block after a minute. I felt so let down by myself and I also felt stupid infront of proffesionals, but at least I got up there and gave it a shot.

We had some guests visit us from various places who we had to present our projects in front of, James Allison from Bennett & Associates, Craig Scott from Leeds Beckett University, Sabine Belokopitova, a lecturer from Northampton University, and my own class lecturer Peter.

The guests were brilliant. They each gave us all some constructive criticism on our presentations. They pointed out areas that were great, and areas that were not so great that could do with improving.

I think the guests generally liked my idea, however, the way I tried to sell it in a presentation didn’t work so much. Things I need to improve on to make a successful presentation was to show the context around the site, a bigger diagram of my wall/floor/roof details, and improve on my rendering skills.

Its almost the end of the second year. Its been extremely tiring and stressful, but I feel like I have gained extra skills that I can continue to develop, which I have thoroughly enjoyed.

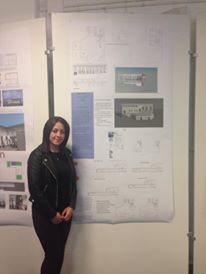
final presentation photo

Interim presentation for design project

For the most recent design project (Vulcan Works)

As a class, we had each been asked to produce a pin up presentation, to include two A1 sheets of all the work we have done for the project so far. This was to include research, precedent study, three different design concepts, the chosen concept developed with a structural grid system, simple floor plans, sections and elevations, environmental strategy and fire procedure.

I won’t show my work just yet, as I feel I did a poor job, although much better than the presentation for the previous project! I lack in confidence and self esteem, which is noticeable in my work. I will try to continue to work on this issue so I can (eventually) show you all some great work!

Despite the lack of confidence, I recieved some positive comments, which made me feel slightly more positive about it :). I also recieved some feedback on what I should be focusing more on at this time.

– Think more about fire procedure e.g Protected fire proof roof.

– Plot a structural grid that makes more sense on both floors- with spans.

– How to tackle the slope in the site- where is ground level?

– Where is the roof height compared to the exisitng facade?

– Focus on one area for the environmental strategy, rather than the whole building,

– Need to think more about environmental strategy.

During the week I had fixed most of these issues, but need to continue to work on it.

Revit Continued…

Throughout the term I have been learning more about Revit. I am finding it quite a challenge and with the pressure of the rest of the work load know that I am falling behind on the tasks being given. It’s all about practice, but there just isn’t enough time!

anyway.. here are some bits and bobs that I have managaed to create (somehow!) on Revit so far.

1 2

Creating a curtain wall ^^                                                   Dimensions, Floors, Views ^^

3 4

Building By Mass ^^

5

Vulcan Works Elevation ^^

I am now to continue working on the Vulcan Works Elevation, creating families and wall sweeps ect. for my new CAD assignment (I will go into further detail once the brief has been issued to me).

Design Project- Vulcan Works Continued…

Brief

The brief states that I am to design a multipurpose building with a minimum of two functions, which are related to the cultural quarter of Northampton.
My final structure and finishes should be sustainable, robust, and have minimum environmental impact on their manufacture, acquisition, transportation, construction, re-use and maintenance.

After researching on materials based upon these requirements, I have come to the conclusion that my building should be constructed using a concrete framing system.

What?

Archaeology and Conservation Museum/Gallery

Multipurpose venue

• Lecture room
• Shop
• Museum/gallery area- archaeology displays highlighting collections from Northamptonshire archaeologists and their findings.
• Café area.
• WC/disabled WC/baby change.
• Stairs to 1st floor.
• Two studio flats on 1st floor.
• Perhaps a small library if the space can incorporate it.
• Workshop areas- for students to use archaeological techniques to discover and record information.

Why concrete framing?

• Built-in-fire resistance- effective barrier to fire spread
• Strong and durable- not weakened by moisture, mould or pests
• Low maintenance- inert, compact and non-porous, does not attract mould or lose its key properties over time
• Versatile
• 100% recyclable
• Affordable- less costly to produce
• Excellent thermal mass- Concrete walls and floors slow the passage of heat moving through, reducing temperature swings. This reduces energy needs from heating or air-conditioning, offering year-round energy savings over the life-time of the building. One study quoted by the NRMCA found that concrete walls reduce energy requirements for a typical home by more than 17%
• Albedo effect- The high “albedo” (reflective qualities) of concrete used in pavements and building walls means more light is reflected and less heat is absorbed, resulting in cooler temperatures. This reduces the “urban heat island” effect prevalent in cities today, and hence reduces energy use for e.g. air-conditioning

http://www.wbcsdcement.org/index.php/about-cement/benefits-of-concrete#10
The floor will be a concrete slab. The interior ground floor will be polished concrete for the majority of floor.

I am to consider the surrounding physical context carefully. The building façade is listed, which limits what I can do with it.
I have decided I will have two areas of access. There will be an access through to the building via Guildhall Road side; through a door that is already there (the doors will be restored). I wish to keep this as it represents a very rich and layered history of Northampton. There will also be a main entrance via Angel Street (where there will be a small car park, mainly for visiting lecturers and staff only).

There are certain restrictions on how tall I can build and how many m2 the building can be.
– Maximum building area should not exceed 950m2
– Maximum building height 16m
– Maximum built up intensity 250%
I will continue to develop one idea, and update this as I progress.

History and Materials- App Project

As you may have seen in one of my previous blog posts, we were asked to produce a short report on a few chosen buildings within Northampton. The information was to be added to a new app (Follow Northampton), which I also talked about in my previous blog.

I originally selected two buildings, one of which I struggled to find much research on. I was luckily allowed to change my choices. I chose ‘The Shipmans Pub’, ’78 Derngate’, and ‘New Ways’. The report for each of these was to include 300-400 words along with CAD drawings, and images.

Below is a link to my work for the project. I really enjoyed writing this report, and I managed a grade B-, which I can’t complain about 🙂

App Assignment complete

First look at Revit

In my first Revit lecture, we covered a few basics to get us started. This was before it all got confusing!

Opening REVIT
Opening existing Project
Interface
Top Ribbon
Left side Properties
Left side Project Browser
Ribbon (tabs) Minimizing

Drawing a basic grid
Ribbon->Architecture->Grid
Draw mode
Offset mode
Changing Annotations

Views
Left side project browser->
Floor plans
Change the name
Elevations
Add Floor (Ribbon->Level)
Draw wall
Ribbon ->Wall ->Architectural
Change wall dimensions
Change wall orientation
Change wall type
Explore wall layers
Wall height constraints
Properties (base constraint & top constraint)
Location line types
Add door
Ribbon->door
Select door
Load other door family
Place door
Edit door location
Add window
Ribbon->window
Select window
Load other window family
Place window
Edit window location
Edit window level

Shortcuts used: WT –Maximize all open windows
C- Copy
ZE- Zoom Extents